Honda EU2200i Generator Maintenance
EU2200i maintenance
Welcome to the Honda power equipment video about EU2200i maintenance. In this video we will show you how to properly maintain your generator so you can continue to enjoy it for many years. An improperly maintained generator can potentially be dangerous to the operator and those nearby. For any additional information regarding the maintenance of your EU2200i always refer to the owners manual or contact your Honda power equipment dealer.
Oil Change
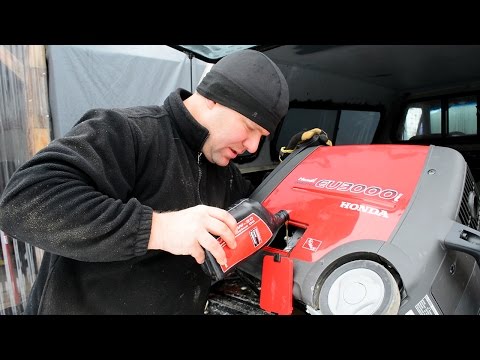
Changing the engine oil is an important step of generator maintenance which should be followed according to the maintenance schedule in the owners manual. Draining the oil while the engine is warm helps the oil to drain quickly and completely. To begin draining the engine oil first turn the engine switch off then move the fuel filler cap vent to the off position to prevent fuel from leaking during the oil change. Using a flat tip screwdriver loosen the maintenance cover screw, remove the maintenance cover and set aside. Place a suitable container next to the engine. position the container so that it will catch the used oil from the filler neck.
Remove the oil filler cap and tip the generator toward the drain pan to drain the engine oil. Allow the oil to drain completely before placing the generator back on to a level surface again. Properly dispose of the used engine oil according to local laws and regulations. With the generator on a level surface place a small funnel into the oil filler hole and refill using about fourteen ounces of SAE 10w30 SJ or later engine oil. Fill the engine with oil until the level is at the upper limit of the filler neck right before it would begin to drip out. To confirm the oil level place the dipstick back into the filler neck without threading it in.
Cleaning oil filters
Remove the dipstick carefully to check the oil level and adjust if necessary. Tighten the oil filler cap securely and wipe off any spilled oil. Reinstall the maintenance cover and tighten the screws securely. Inspecting and cleaning the engine’s air filters properly can prevent poor performance and expensive engine repairs. If you operate your generator in dusty conditions then servicing the air filters should be done more frequently. Using a flat tip screwdriver start by loosening the maintenance cover screw. Remove the maintenance cover and set aside. Loosen the air cleaner cover screw, removing the air cleaner cover, also setting it aside.
Remove both the main and outer air filters from the air cleaner housing and inspect for dirt and debris. Replace the filters if damaged and if dirty follow these simple steps to cleaning and reeling. Clean the air filters in warm soapy water, rinse with water, squeeze gently and allow to air dry completely. Once dried place both of the air filters in a resealable bag with a small amount of clean engine oil to distribute the oil throughout the filter. Remove the filters and pat dry to remove the excess oil. Any excess oil in either of the air filters can cause the engine to smoke. Wipe both the air cleaner cover and air cleaner housing.
Spark plug servicing
Using a clean rag to prevent dirt from entering the engine reinstall both filters in the reverse order of removal. Spark plug inspection and replacement are required at set intervals to keep the engine running properly. Allow the engine to cool before servicing the spark plug. To access the spark plug remove the spark plug maintenance cover and set it aside. Disconnect the spark plug cap by pulling upward away from the engine and push to the side cleaning any dirt or debris from around the spark plug cap area. Using a spark plug wrench or a 5/8 inch socket loosen and remove the spark plug. Closely inspect the spark plug electrodes and ceiling washer.
Replace the spark plug if the electrodes are worn, damaged or fouled or the ceiling washer is damaged or missing. Measure the spark plug electro gap using a commercially available gap gauge. The spark plug gap should be between 0.6 and point 7 millimeters. Adjust the gap if necessary. Install the spark plug by hand and thread in until it stops. Once seated use a torque wrench to tighten the spark plug to eight point seven pound-feet. If you don’t have a torque wrench tighten a new spark plug half of a turn and if reinstalling a used spark plug tighten 1/8 to 1/4 of a turn until secure. Reinstall the spark plug cap followed by the spark plug maintenance cover.
Spark arrester
Cleaning the spark arrester is another important step to properly maintain your generator that should be completed according to the maintenance schedule in the owner’s manual. To keep the engine operating properly before cleaning the spark arrester be sure that the engine has cooled as the muffler will be very hot. If the generator was recently running to clean the spark arrester first remove the four screws that secure the muffler protector and set the muffler protector aside. Now remove the three bolts that secure the muffler to the engine, remove the muffler and remove the spark arrester.
Set the muffler aside. Use a brush to clean the carbon deposits from the spark arrester and inspect the screen for damage. Replace the spark arrester if necessary. Closely inspect the muffler gasket. Replace it if damaged then reinstall the spark arrester into the muffler and reinstall in reverse order of removal. For any additional information regarding your EU2200i maintenance I refer to your owner’s manual or contact your Honda power equipment dealer.
We had our carpets cleaned for a great price by Carpet Clean Stockton .Anyone passing by Stockton-on-tees near Middlesbrough Give them a shout!


