Honda Generator Carburetor Cleaning
Cleaning a Generator Carburetor
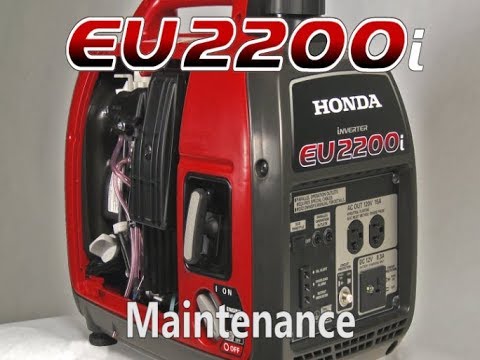
Generator carburetor cleaning. Today we’re working on a Honda generator EU 2000 I. We’re going to show you how to clean the carb and drain the fuel system. Today’s tools are going to need a flathead screwdriver, a pair of pliers, a small flat-head screwdriver, a eight millimeter socket with ratchet and a pair of fuel line clamps. Now before you perform any repairs on the fuel system on top of the fuel cap it has an off valve. Turn that valve off to prevent any spillage coming out of the cap. Make sure your machine is in the off position.
[WPXperVideo id=13 ]
Stripping down
Take your flat-head screwdriver and remove the access panel on the side of the generator. You’ll need to remove the screw on the front of the air filter cover. Remove the cover, remove the filter and the lower filter. Inside the air filter cover there is a eight millimeter screw. You need to remove that and also two eight millimeter screws that holds the air filter housing and carburetor to the engine. While removing the air filter housing there is a small black breather hose that runs from the crankcase up to the air cleaner. You’ll need to remove that before you can remove the air cleaner. Then this will remove.
Now once you got to this point you’re going to have to remove the fuel line that comes from the fuel pump to the carburetor. Use your fuel line pliers and you want to clamp off the fuel line. Then you want to remove the small clamp that’s on the fuel line that holds it to the carburetor. Now you need to keep a red rag handy for this. Once you pull out the fuelline you are going to leave some fuel. Remove your air filter gasket, check for any damages. If you suggest it has a rip or see any damages to the air to the gasket we recommend replacing. Now before we move in the carburetor you’re going to need to drain the fuel bowl.
Drain the carburetor
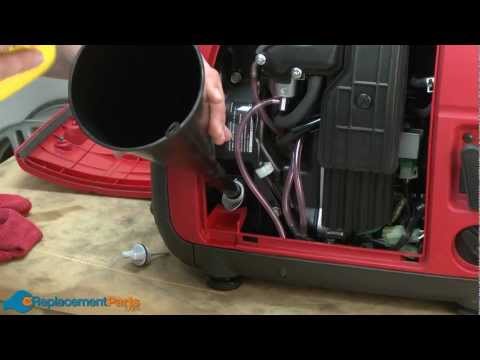
For that you need a drain pan and your small flat-head screwdriver. In the bottom of the carburetor there’s a small flat head screw that comes out of the bottom allows you to properly drain. At the bottom of the generator there’s a hose that runs right out the bottom so we can drain right out the bottom of the machine. As you turn the screw out you’ll notice you have flute fuel flow at the bottom of the carb. Let that drain out. Now you can move the carb out a little farther. On top of the carb there’s electronic throttle control for your Eagle throttle. You’ll need to remove the white cover that’s on top and then you’ll need to remove the wires that are on top also.
Remove the carburetor
Now you’re able to remove the carburetor from the engine and remove the fuel lines from the housing. So once you have this off there’s a gasket on the back side between the carburetor and the engine. You can inspect that for any damage and replace if necessary. So what we recommend doing is taking off the 10 millimeter bolt at the bottom of the float bowl. Then you want to hold the carb over the top of a drain pan because once you do take the bolt off there still is going to be some fuel that’s left in the bowl. Take the bolt out and remove the float bowl.
Now with the float bowl off you want to inspect for any varnish or any type of dirt debris there might be at the bottom and clean it as necessary. With the carburetor off you want to remove the float pin and remove the float. Next, with the float you’ll notice that there’s a needle on a spring. That’s what controls the flow of fuel into the carb. It seals it to prevent more fuel or allow more fuel into the carb. You want inspect that for any damage or dirt or debris. Now with this off there is a gasket that seals the float bowl to the carburetor body. You want to remove that gasket and replace once you have it out.
Generator carburetor cleaning
This gasket right here is the most important. You want to replace every time you go clean the carburetor just due to the fact that it will warp once you take the float Bowl off and will not seal. Now you use a small screwdriver. Inside this main tube is your main jet so as the fuel flows in this this is what controls how much fuel goes into the engine. Alright now once you get the main jet out, main jet will look something like this, you want to inspect this for debris or varnish for your most your debris is going to going to end up once it comes through the carburetor and you get this one too you want to, each side of this you’re going to find little holes.
You want to make sure all those are clean, inpected for debris and varnish. Now when cleaning the carb make sure your straw is on the carb cleaner. Make sure safety glasses are on. You want to blow through it, go through it the other way. Inspect it to make sure you’ll have any more debris and follow with compressed air. Same thing with your main jet. Blow through it with carb cleaner, follow with compressed air. Same thing with your float bowl. Wash it with carb cleaner. Follow with compressed air to take out any dirt or debris. Now with the carburetor itself you want to push it through where that needle is and where your fuel flow comes in.
Flushing out
You push the carb clinger through that to flush out any dirt or debris. Same thing through where your main jack came through and then on the front and the back of the carb there’s air orifices. You want to also flush those out with carb cleaner and then also follow with compressed air and once your carb is completely clean now you’re ready to reassemble.
Reassembly
Alright during reassembly you’re going to want to note how this came out of the carb. You’re going to put that in first and then you’ll insert your main jet. You’re going to want to make sure that the flat head part which you took out with the screwdriver goes in last so that way you’re still able to screwdriver in to tighten it back down. I’ll tighten it back down with your flat-head screwdriver but don’t over torque it because you run the risk of ruining the carburetor or the main jet. Just a slight turn just to make sure it’s lightly seated. Then you want to make sure you reinsert your float ball gasket. Make sure it’s seated down in the groove of the carburetor.
Here is a link to Honda generator carburetor rebuild kits on Amazon
Now you want to make sure your float and then that needle is clean. I recommend replacing the needle and nut every time you clean it. Place it back on the carburetor. Install your flow pin. Now you want to reinstall your float Bowl. You want to make sure when you put the float Bowl back on you have your drain valve facing the front of the carb. That way when you go to put the carb back on or when you go to take it back off the drain valves in front and you are able to drain it. Then you want to replace the float bolt. On this bolt there is also a gasket. They will come with the float Bowl kit. Make sure you replace the gasket.
Reinstall the carb
Tighten the float ball nut back down with your ten millimeter wrench again. Don’t over torque just lightly see, to prevent damage to the carburetor. Now you want to make sure that you reinstall your gaskets in between the carb and the cylinder head. I recommend replacing these unless they’re not damaged. Now you reinstall the carb. You want to make sure you reconnect your wires for you electronic throttle control. Then you want to replace the gasket in between the carburetor and the air filter.
Fuel Lines
Now you’re going to reroute the the fuel lines that you took out for the drain. Now the drain hose it comes out the bottom. You just want to show just a little bit at the bottom of the housing. Now you want to reinstall your fuel lines, now install Your air filter cover.You want to make sure that you put your breather back on the cover on the little nipple that comes out the bottom. Check your air filters. Make sure they’re clean, free of dirt or debris and reinstall back into the housing. Now before you put the access panel back on I recommend turning on the fuel valve, check on your carburetor for any more leaks. Visually checking anything, make sure nothing’s leaking inside the cover before you put it on or start the machine.
I let it run for 10 or 15 seconds, let the engine warm-up. Now when you shut the machine down just verify that you don’t have any fuel coming out of the overflow. That shows that the carburetor is sealed and there’s no issues with the machine.


